How to automate your freelance client onboarding in 2025
In this guide, we'll go over a six-step freelance client onboarding checklist to make sure you make a great first impression every time.


Almost three years ago, I quit my 9-5 and started freelancing.
It was a terrible idea.
I wasn’t terrible at running a business, but I was severely underprepared for what was about to come.
I thought freelancing was just about doing great work. Turns out, that's maybe 40% of the job. The other 60%? Admin stuff I never saw coming. Chasing down contracts. Following up on invoices. Playing email ping-pong to get basic project info.
And don't even get me started on trying to look professional. My freelance client onboarding was a disaster. But, you live and learn.
And now that I’ve learned, I want to give that knowledge to you. So, let’s go over how to automate your freelance client onboarding like a pro.
What is freelancer onboarding?
Freelancer onboarding is the process of bringing a new client into your business and setting up everything needed to work together successfully. It starts the moment they say "yes" to working with you and includes all the steps to get them set up, informed, and ready to go.
A professional onboarding process usually includes sending a welcome message, collecting important information through intake forms, getting contracts signed, setting up payment methods, and providing access to communication channels. When done right, it sets the tone for your entire working relationship.
The problem is, most freelancers handle onboarding manually through scattered emails, random Google Docs, and back-and-forth messages. This creates a messy first impression and wastes hours of time that could be spent on actual client work.
That's where automation comes in. And in this guide, I'll show you exactly how to set up an automated onboarding system that makes you look professional, saves you time, and actually impresses your clients from day one. We'll cover everything from choosing the right client portal software to automating your welcome messages, intake forms, contracts, and payments.
No more rambling. Let’s get started.
6 steps to automate your freelance client onboarding
Here’s a six-step process to automate your client onboarding:
- Use client portal software to automate onboarding
- Create a welcome message that automatically sends
- Set up intake forms to trigger on actions
- Invite your client to their own portal
- Get your contract signed (automatically)
- Set up your payments (invoices or subscriptions)
Alright, let's go over each of these.
1. Use client portal software to automate onboarding
When I first started freelancing, my "onboarding process" was basically a mess of Gmail threads, random Google Docs, and invoice PDFs I generated with a free online invoice tool (with my bank details in a follow-up email). Professional? Not really. Scalable? I don’t think so.
The reality is that as a freelancer, you're competing with agencies that have entire teams dedicated to client experience. But you know what? You can actually provide a better experience than they do. You just need the right tools.
That's where client portal software comes in. Instead of asking clients to bounce between five different tools just to work with you, you give them one login where everything lives. It's like having a virtual back office where all your client work happens.
I tried building my own portal once. I spent weeks on it before I discovered there were actual tools built for this. After testing pretty much everything out there, I landed on Assembly because it's specifically designed for freelancers and small service businesses.
The turning point for me was realizing that the best client portals help you create an entire automated experience that makes you look like you know what you’re doing, even when you're working from your couch in pajamas.
With a proper freelancer client portal, everything runs on autopilot:
- Clients get their login credentials automatically
- Welcome messages go out without you typing a thing
- Forms, contracts, and invoices appear exactly when needed
- You look professional without the enterprise price tag
If you're still in the early stages of starting your freelance business, trust me on this: set up your systems before you need them. I waited until 1 year into my freelance business, and wanted to cry trying to get all my clients organized retroactively.
Want to see exactly how it works? Check out this interactive demo below. You can click around and see what your clients would experience:
The cool thing is once you set this up (takes like an hour), every single client gets the same experience. No more forgetting to send that welcome email or contract. No more looking like you're winging it (even though we all are).
Your clients think you're incredibly organized. Meanwhile, you're automating everything and focusing on what you actually want to do, the work itself.
Okay, now that we have that out of the way, let’s go into the first part of onboarding a client (assuming they already agreed to work with you).
2. Create a welcome message that automatically sends
Imagine a new client has just signed up to work with you. They're excited but also a little nervous. They just paid you money (or maybe haven’t yet) and now they're sitting there wondering... what happens next?
This is your moment. And if you blow it by going MIA for 24 hours, you've already started the relationship on the wrong foot. I’m speaking from experience here.
That's why the first thing I set up is an automated welcome message that greets them the moment they log in. They open their portal for the first time, and boom, there's a message from me that makes them feel like they made the right choice.
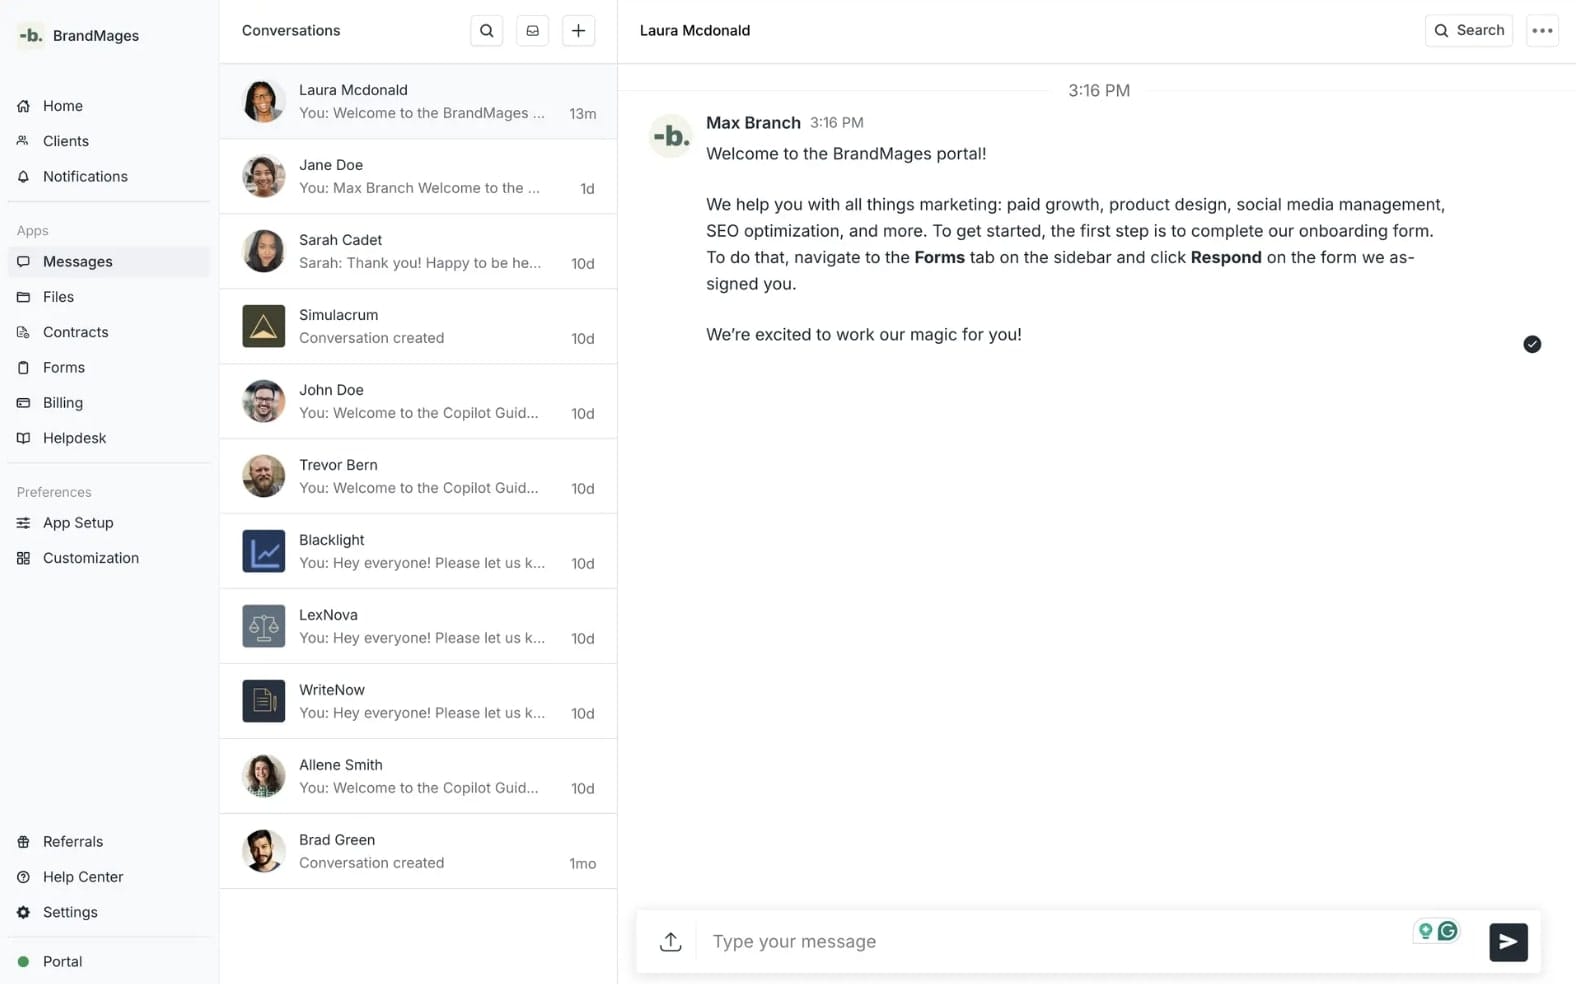
Here's what my welcome message includes:
- A genuine thank you (people like feeling appreciated)
- What happens next in super clear steps (either in text or a Loom video)
- Links to their first tasks (usually the intake form)
- My typical response times so they know what to expect
- A little personality so they remember I'm human
Inside Assembly, I use the Messages App to set this up once and never think about it again. Every client gets the same warm welcome, but it feels personal because it's waiting for them in their portal, not some generic email.
The magic is in the timing. Within 30 seconds of signing up, they're already getting value. They know exactly what to do next. They feel taken care of. And I didn't have to do anything because it's all automated.
Want to see exactly how to set this up? Check out this complete guide to Assembly's Messages App. But honestly, it's fairly simple. Write your message once, set it to trigger on account creation, and done.
The cool thing is you can create different welcome messages for different types of clients. My design clients get one message, my consulting clients get another. Same portal, totally different experience based on what they need.
Automation doesn't mean impersonal. It means consistently personal. Every client gets your best first impression, every single time. Use these AI automation features to your advantage.
3. Set up intake forms to trigger on actions
If you’ve ever onboarded a client, you know all the back-and-forth messages that get sent to try to get basic info and access to certain tools.
"What's your website URL?" "Can you share your brand guidelines?" "What's your Instagram login?"
Back and forth, back and forth. By the time you get all the answers, a week has passed, and you haven't even started the actual work.
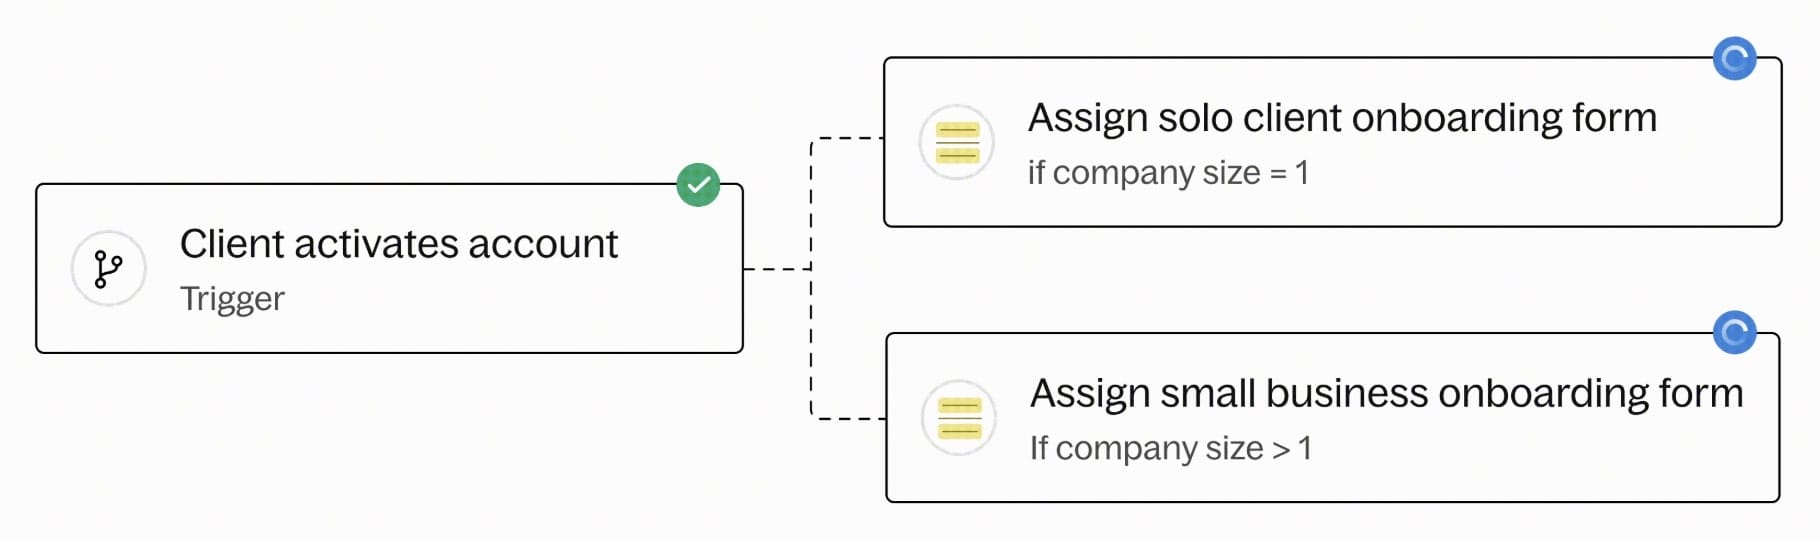
This is where intake forms save you time. Instead of 27 emails, you send one form that collects everything upfront. But where it gets really good is that you can automate when these forms appear based on specific triggers.

Here's my setup:
- Client logs in for the first time → Welcome message appears with link to intake form
- Client pays their first invoice → Different form triggers asking about project specifics
- Client books a strategy call → Pre-call questionnaire automatically assigns
The beauty is that different services need different info. If you're starting a social media marketing agency, you need their social handles and content preferences. But for website design, you need brand assets and competitor examples.
With Assembly's automation features, I create different forms for different services, then set them to trigger automatically. No manual sending. No remembering which form goes to which client. It just happens.
Some questions I always include:
- Access credentials I'll need (Google Analytics, social accounts, etc.)
- Brand voice and style preferences
- Examples of work they love
- Their biggest pain points right now
But here's my favorite trick: I connect form submissions to other automations. When a client submits their intake form, it can:
- Notify me in Slack
- Create a project in my task manager
- Update their client profile with key info
If you need inspiration, check out these client intake form examples from different industries. Steal what works, ditch what doesn't.
The goal isn't to interrogate your client with 50 questions. It's to get just enough info to start strong. Save the deep dive for after you've built some trust. And whatever you do, make it easy to answer.
4. Invite your client to their own portal
Alright, you have your portal set up, your welcome message ready, and your intake forms automated. Now comes the part where you actually get your client inside.
There are two ways to do this, and I'm going to tell you which one to use when.
The manual method (start here)
When you're just getting started or working with high-touch clients, manually creating client accounts gives you total control. You add their info, double-check everything looks good, then send them their invite.
I still do this for my bigger clients because it lets me:
- Customize their portal before they see it
- Pre-load any files or resources they'll need
- Make sure their specific automations are set up right
- Feel confident that everything's perfect before they log in
Want to see exactly how the manual process works? Play around with this interactive demo:
The automated method (scale mode)
Once your onboarding is dialed in, you can switch to sending clients a sign-up link. They create their own account, and all your automations kick in automatically. This is clutch when you're juggling multiple clients or selling productized services.
If you're more of a visual learner, check out this video tutorial on creating and inviting clients. It walks through the whole process step by step.
Remember that the invite is your client’s first real interaction with your professional setup. Make it smooth. When they click that invite link and see their name already there, just waiting for a password, that's when they know they hired the right person.
The secret is that clients love having their own portal. It makes them feel like a VIP. Instead of being "just another email in your inbox," they have their own space where their project lives. It's small things in your overall client experience that make a big difference.
5. Get your contract signed (automatically)
Remember the old days of emailing contracts back and forth? Send the PDF, wait for them to print it, sign it, scan it, email it back... if you're lucky. Half the time they'd forget, and you'd have to send that awkward "just checking in on the contract" email.
Now? My contracts practically sign themselves digitally.
The thing about contracts is that you need them, but nobody gets excited about them. The key is making them as frictionless as possible. The easier you make it, the faster you get to the fun part (actually doing the work and getting paid).
With Assembly's Contracts App, I upload my contract template once, and it's ready to go for every client. No more:
- Attaching PDFs to emails
- Wondering if they received it
- Following up awkwardly
- Dealing with "can you resend that?"
The e-signature feature means everything happens right in the portal. Your client doesn't need to print, sign, scan, or use another tool. They just click, type their name, done. You both get a copy automatically.
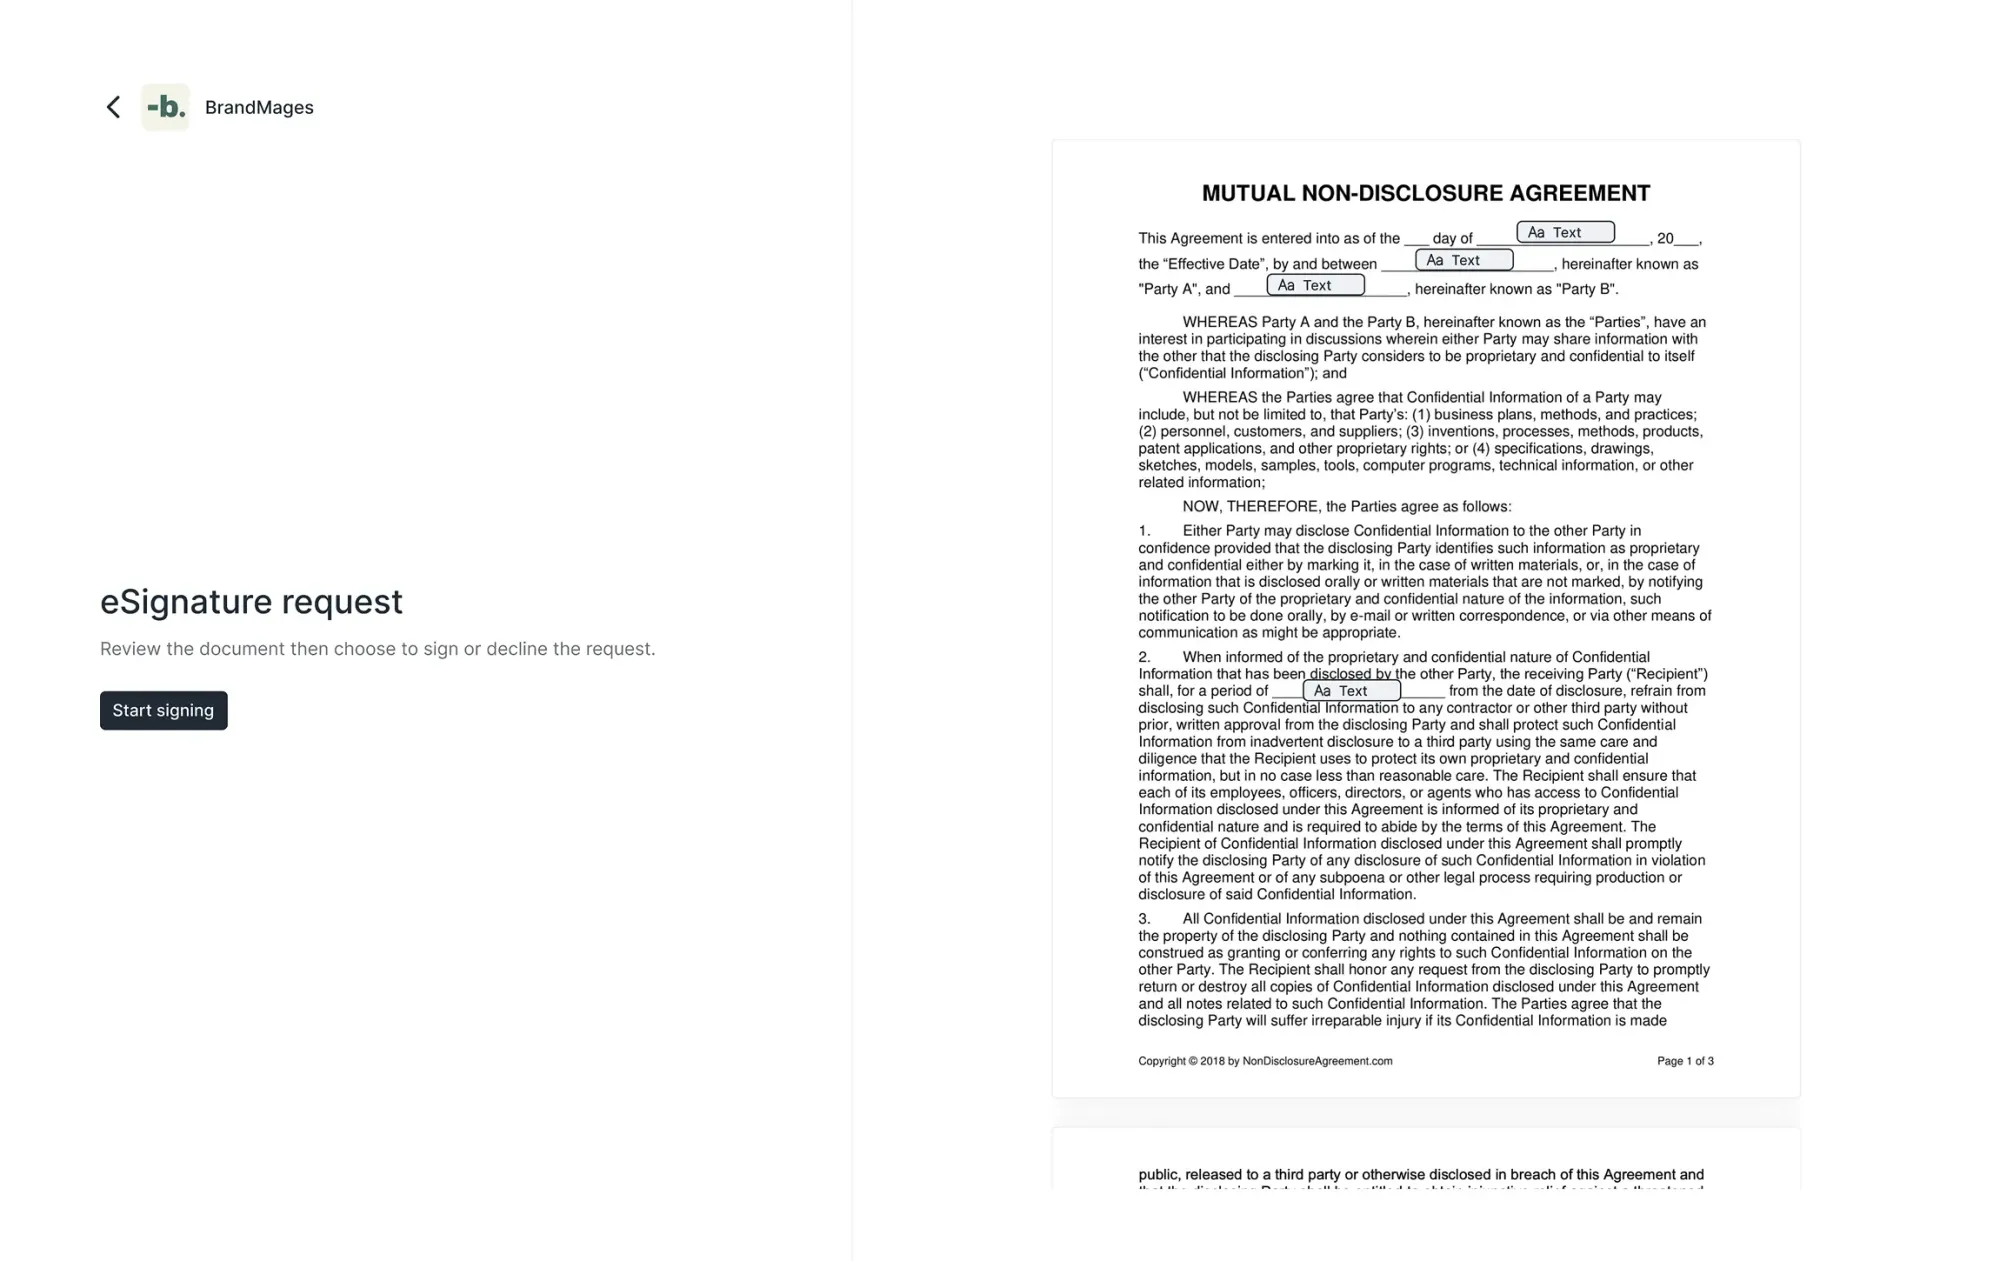
My setup is stupid simple:
- Client account created → Contract automatically appears in their portal
- They log in → See welcome message → Click to review contract
- Sign digitally → Both parties get PDF copies
- Signed contract triggers → Next automation (usually a follow-up message)
If you need a starting point, grab this freelance contract template and customize it for your services. Just remember that your contract should protect you, but not scare clients away. Keep it clear, not corporate.
6. Set up your payments (invoices or subscriptions)
Can we talk about the most awkward part of freelancing for a second? That moment when you have to ask for money. Even after years of doing this, I still feel weird sending payment reminders.
The final piece of your automated onboarding is making sure you actually get paid (kind of important). And just like everything else, this should happen automatically without you having to chase anyone down.
The good news is that you can automate this with Assembly (with your client’s consent first).
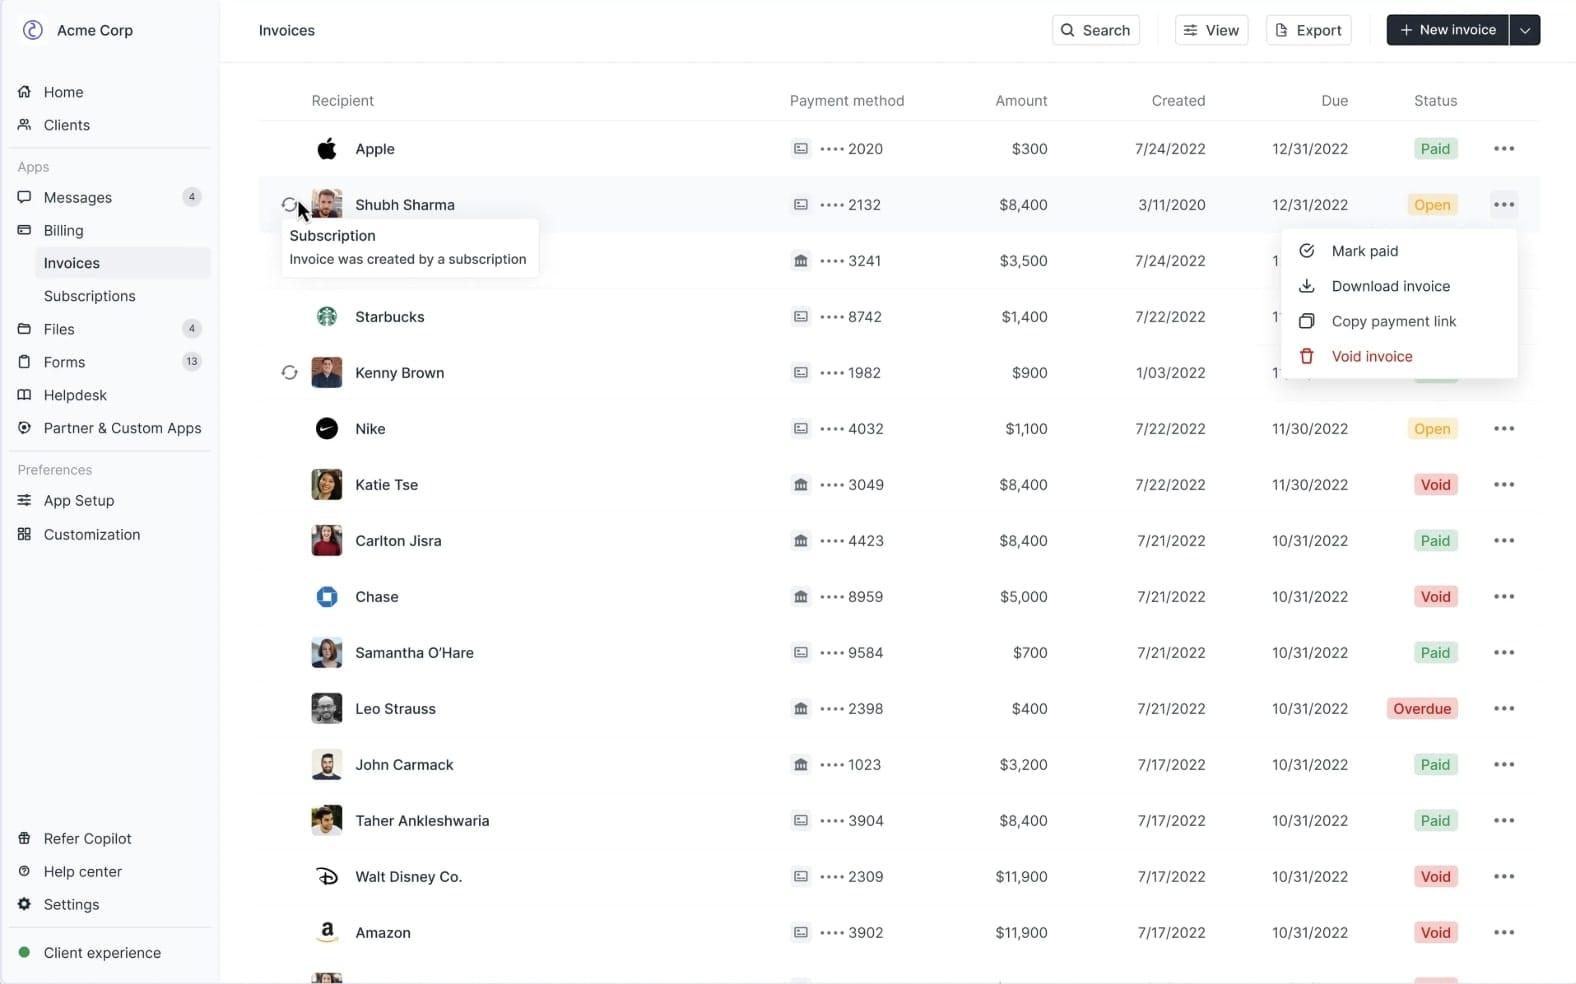
With Assembly's Billing App, payment becomes just another easy step in your onboarding flow. Contract signed? Invoice appears. Due date hits? Automatic reminder. Payment received? You get a notification while you're binge-watching YouTube videos or scrolling into oblivion.
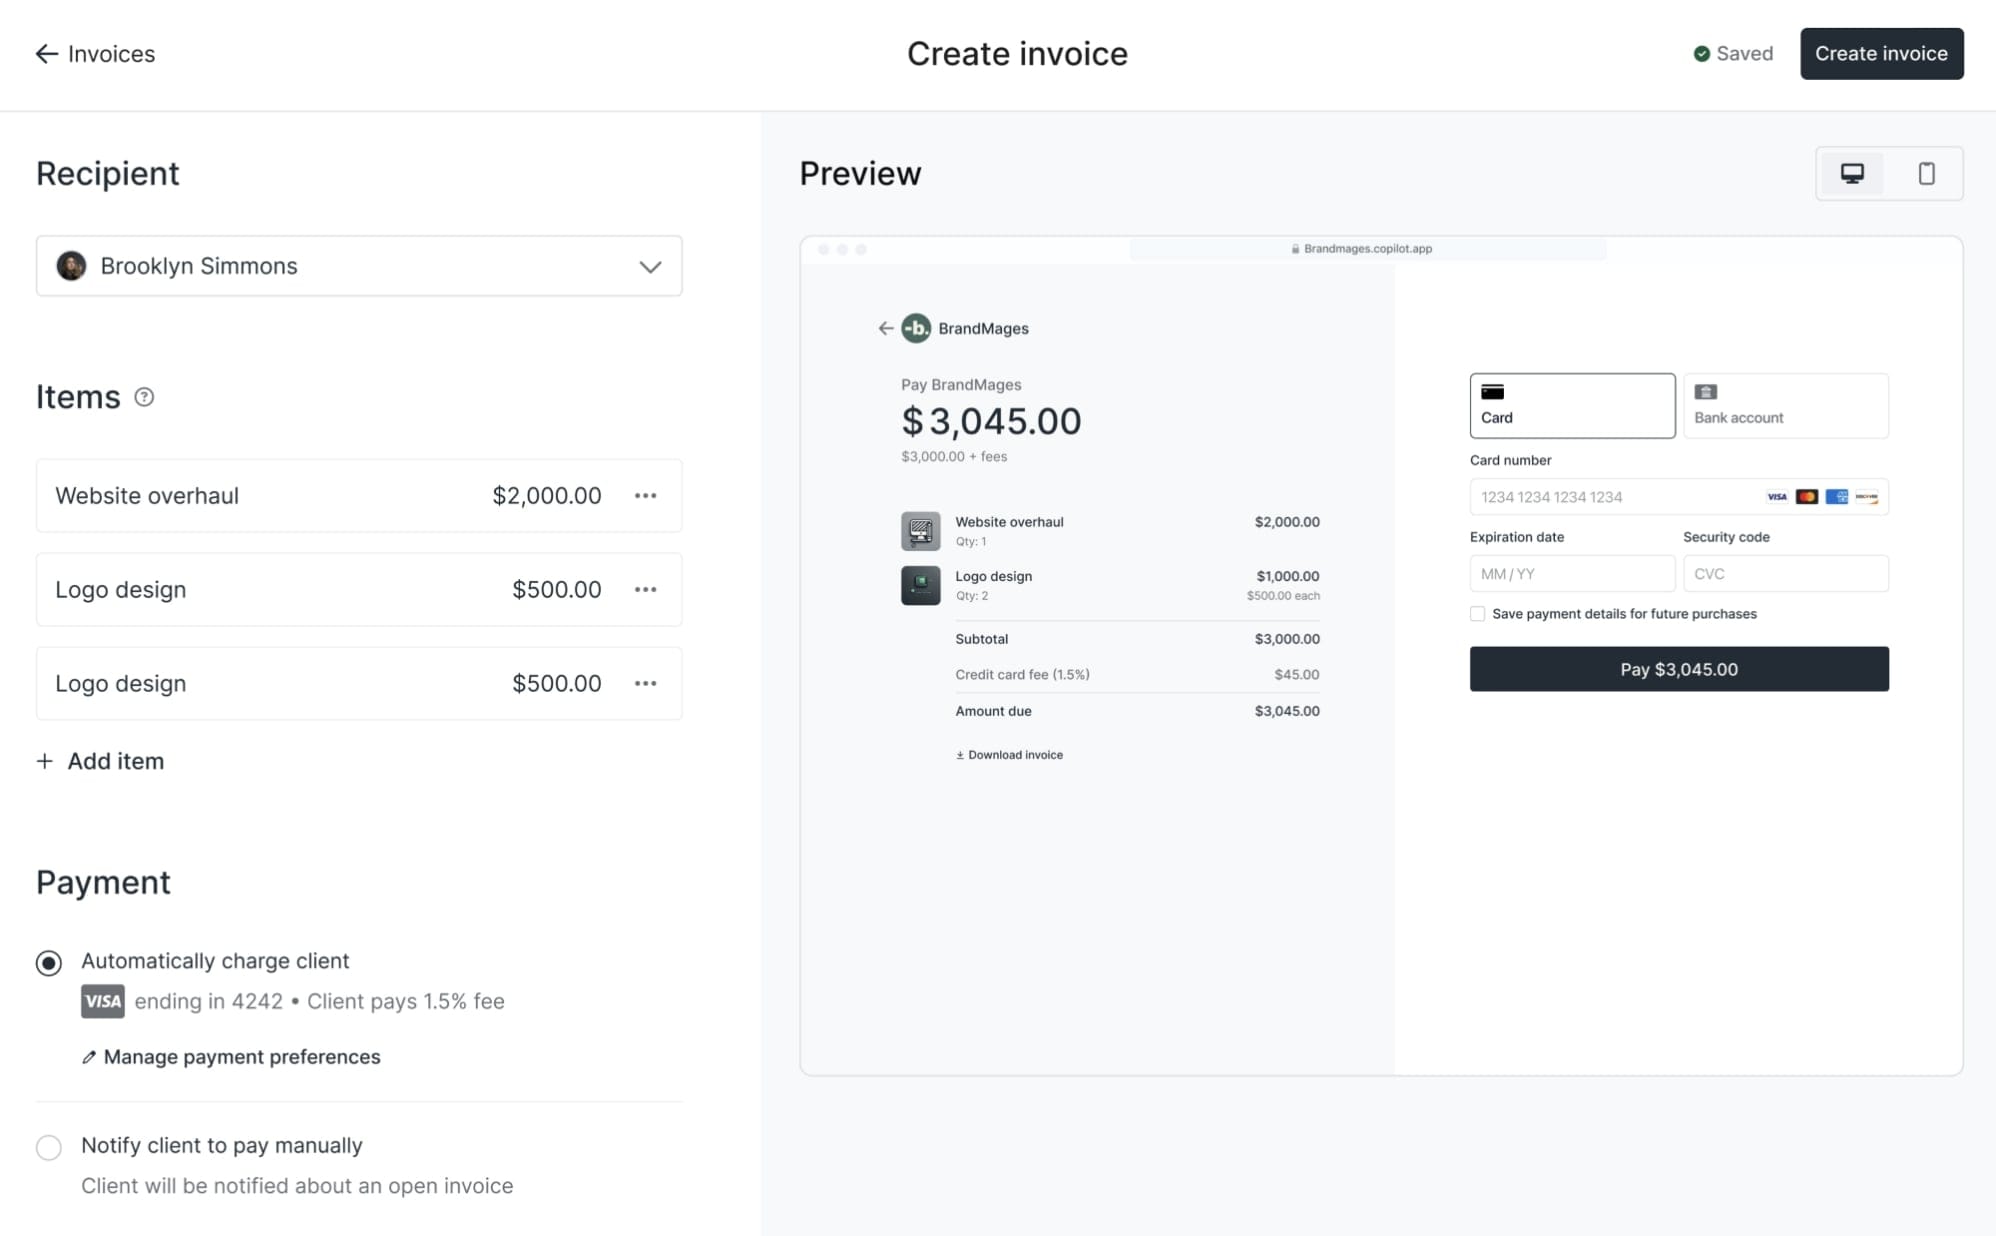
Here's how I structure payments:
- One-off projects: Invoice is ready to be sent right after contract signing
- Ongoing work: Monthly subscription that auto-charges
- Hybrid model: Deposit invoice upfront, then monthly billing
The magic happens because everything runs through Stripe, so your clients can pay with:
- Credit or debit cards
- ACH bank transfers (great for bigger invoices)
- Their saved payment method (for subscriptions)
My favorite feature? Setting up recurring subscriptions. Instead of sending a new invoice every month and hoping they pay on time, it just happens. Their card gets charged, you get paid, everyone's happy. It's like having a real business instead of constantly begging for money.
But what really changed the game for me is the new Store feature. Now I don't even have to create client accounts first. Potential clients can browse my services, pick a package, and buy directly from my store. They automatically get onboarded into their portal, and the whole automation sequence kicks off.
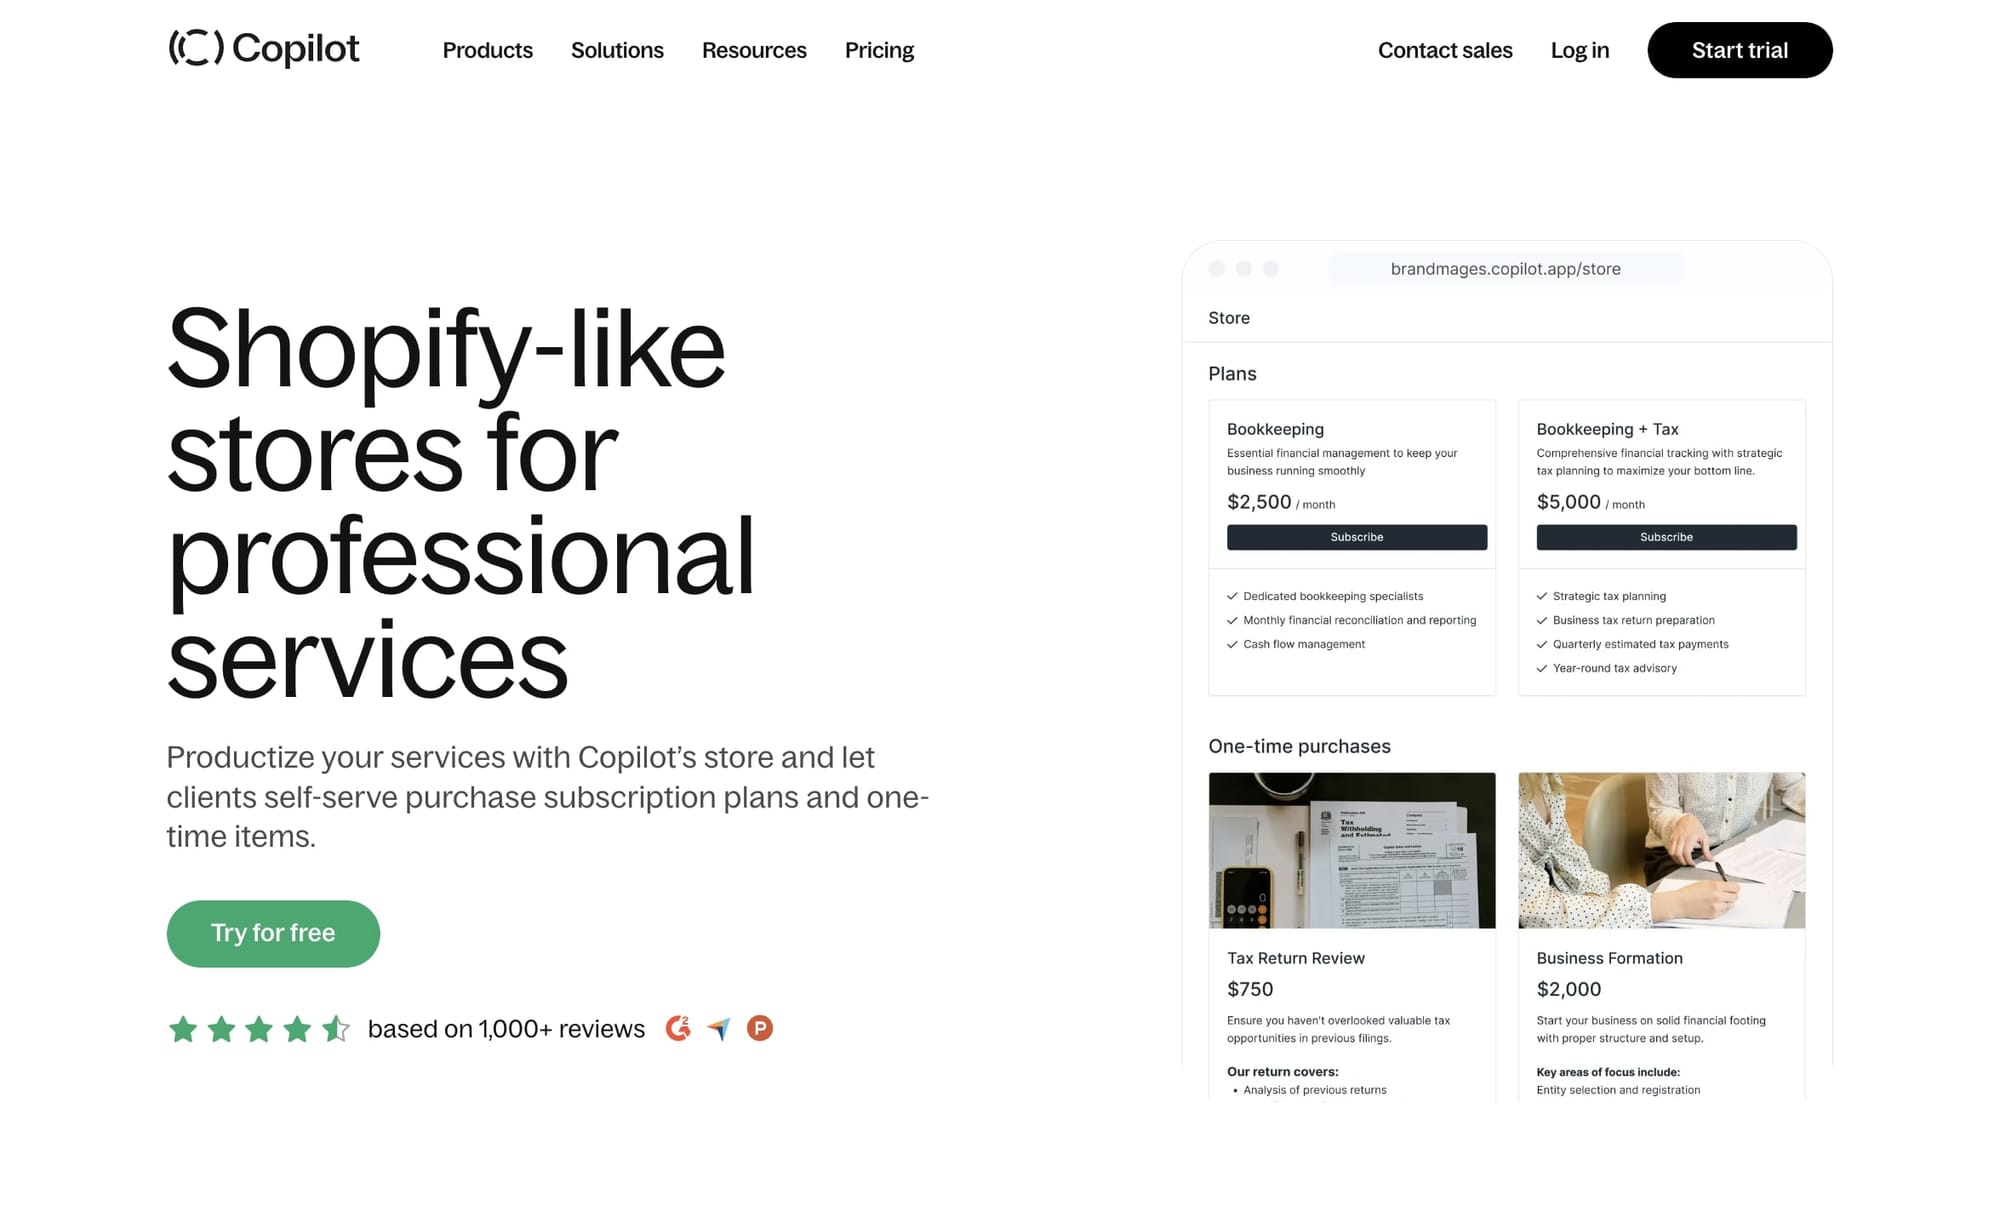
In Assembly, there’s also a processing fee option that lets clients cover the transaction costs. Most don't mind paying an extra fee if it means they can use their credit card. That's money back in your pocket. You can also use the Store to sell add-ons to existing clients — rush delivery, extra revisions, and strategy calls. They just click and buy without the back-and-forth negotiation.
If you're exploring options, check out this guide to invoicing software for freelancers. But honestly? Having it all in one place with your portal just makes sense. Your clients already logged in to sign their contract. Might as well let them pay right there too.
And that’s it! Congrats, you just automated your client onboarding process as a freelancer. You’re ahead of most freelancers now.
Build a modern freelance business with Assembly
Look, I know what you're thinking. "This all sounds great, but I'm just a freelancer. Do I really need all this?"
Here's what I wish someone had told me three years ago: the difference between freelancing and having a freelance business is systems. It's the difference between constantly scrambling and actually having time to do great work (and maybe even have a life).
Whether you're a designer, writer, developer, consultant, marketer, or any other type of service provider, the challenges are the same. We all struggle with looking professional, getting paid on time, and staying organized without drowning in admin work.
That's exactly what Assembly solves. It's more than another tool to add to your stack. The platform IS the entire stack. Client onboarding, messaging, contracts, payments, project management, task tracking, file storage... everything you need to run your business like an actual business.
You also don’t need to use all of the features right away. I didn’t. You can start small. Maybe you just need better invoicing right now. Cool, start there (it’s what I did first). Then add contracts. Then automations. It grows with you.
I've been using Assembly for 2.5 years now, and honestly? I can't imagine going back to the chaos of bouncing between a million different tools. Your clients deserve a professional experience. You deserve not to burn out on admin work.
Stop piecing together 15 different tools. Stop apologizing for your messy setup. Start running the freelance business you actually want to run.